Advertisement
Cavities (tooth decay) are sneaky — many start without any pain and can progress quickly, especially in children. The key to saving teeth and avoiding big problems? Early detection.
Early cavities are often “silent” and invisible to the untrained eye. Waiting for pain usually means the decay has reached deeper layers (dentin or pulp), making treatment more complex and expensive.
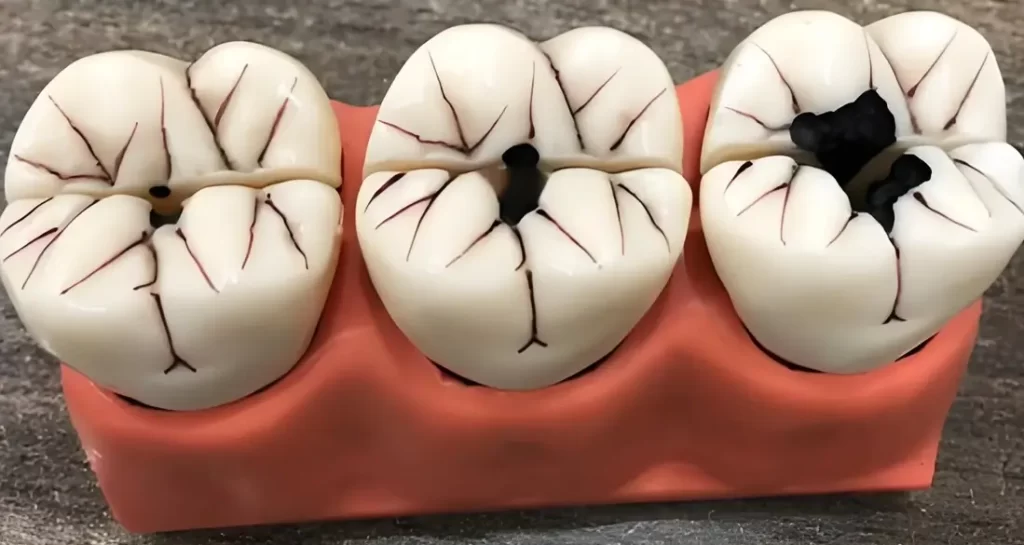
Here are visual examples of early visible signs like small black or dark spots on teeth — classic red flags for cavities:
Self-Checks: Three Ways to Monitor at Home
While self-examination is helpful, it’s limited — many cavities hide where you can’t see or feel them.
1. Sensation (Pain & Sensitivity)
- Cold/hot/sweet sensitivity in a specific spot (sharp, lingering pain) often signals a cavity that’s reached dentin.
- Important note: Shallow (enamel-only) cavities usually cause no pain at all — especially in kids who may not notice or report subtle changes.
- Rule of thumb: Any new or unusual tooth pain → see a dentist ASAP. Pain is a late sign, not an early one.
2. Visual Inspection (Look Closely)
- Check in good light (bright bathroom + flashlight helps) for:
- Small black/dark spots or shadows
- Chalky white spots (early demineralization — looks matte/opaque)
- Tiny pits, rough areas, or broken edges
Here are examples of early white/chalky demineralization (looks like dull white patches — often reversible with fluoride if caught soon):

Pro tip: Take monthly photos of your teeth under the same lighting to spot subtle changes over time.
3. Tactile Check (Feel for Trouble)
- Dental floss test: Slowly slide floss between teeth. If it snags, tears, or catches → possible cavity or tartar buildup.
- Food trapping in the same spot repeatedly? That’s a warning sign — tight contacts or early decay make cleaning difficult.
Warning: Never use sharp objects (toothpicks, metal tools) at home — you risk damaging enamel or pushing bacteria deeper.
Why Many Cavities Stay Hidden (The Sneaky Ones)
Some types are nearly impossible to spot at home:
- Proximal (interproximal) caries — decay between teeth (only visible on X-rays)
Here are classic examples of proximal decay — photo vs. X-ray views showing hidden damage: - Pit and fissure caries — hidden in the grooves of molars (surface looks normal, but inside is hollow)
Examples of “hidden” pit/fissure decay in back teeth:
These “iceberg” lesions (small opening, large cavity underneath) are why self-checks miss so much.
Here’s a professional using a dental explorer/probe to gently detect hidden soft spots:
The Gold Standard: Regular Professional Checkups
Self-checks are helpful but not reliable. Dentists use:
- Magnification & bright lights
- Explorers/probes
- X-rays/bitewings
- Laser fluorescence devices
Official recommendation (from dental boards worldwide):
- First exam: When the first baby tooth erupts (around 6–12 months)
- Preschoolers: Every 3–6 months
- School-age kids: Every 6 months
- Adults: Every 6–12 months (more often if high-risk)
Here are typical pediatric dental checkups — gentle exams that build positive habits and catch issues early:
Early detection is critical because cavity damage is irreversible — once enamel is gone, it doesn’t grow back. Catching decay early often means simple fluoride treatments or small fillings instead of root canals or crowns.
Don’t wait for pain — schedule regular checkups and make them a positive family habit!
Have you ever had a cavity caught early during a routine visit? Share your story in the comments — it might encourage someone else to book that appointment! 🦷✨